What Are The Rules Of Adobe Photoshop Tools For Photography

Clipping path is a closed vector path or shape used to cut out an image in current image editing software like Adobe Photoshop. Once the path is created, clipping path is then applied on it so that anything outside the path will be excluded when you place the file into craftsmanship, In-design or any web developing software and inside the path will remain same as before. Clipping Path is necessary when we use any photo/photograph/image to prepare a design, such as a brochure design, magazine design, web design, leaflet and many more. For example, I have a photograph with background color gray and need to be used on the front page of my catalog.
I must remove the background of that particular image since my catalog color is green and have some other design.  To do so, I will need to create a path around the image and then convert it into a clipping path. And then when I use it in illustrator, InDesign Dreamweaver or any other program the image background will disappear mean no background (transparent). It will show only the image which was inside the path. Look at the images below to get a live view.
Create clipping paths in Photoshop If anyone wants to create a beautiful delineate that transfers well to other applications for wrapping create a clipping path in Adobe Photoshop create. Creating a clipping path is easy when you have a good path.
1.      Use the Pen tool to create a path around the image area that will become the delineate.
2.      In the paths, the panel chooses to save path from the panel menu and then name the path.
3.      From the same panel menu, choose a clipping path.
4.      In the clipping paths dialog box, choose your path from the drop-down list, if it’s not already selected click ok.
5.      Choose file  .Save As and, in the Format drop-down list, select Photoshop EPS, in the EPS Options dialog box that appears, accept the defaults and click ok.
Photoshop elements provide you a toolbox in Quick and Expert modes to help you work on your photos. You can use the tools in the toolbox to select, enhance, draw and view images.
Toolbox in the Quick mode the toolbox in the Quick mode contains a small set of easy to use tools. The tools available in this mode are Zoom, Hand, Quick selection, Eye, Whiten teeth, Straighten, type, spot Healing Brush, Crop and Move. The quick mode toolbox are (a) Zoom tool, (b) Hand tool, (c) Quick selection tool, (d) Eye tool, (e) Whiten teeth tool, (f) Straighten tool, (g) Type tool, (h) Spot healing brush tool, (i) Crop tool, (j) Move tool.
Toolbox in the expert mode In the expert mode, the toolbox is richer than the toolbox in the quick mode. The tools are organized in the following logical group:
1.      View tool
2.      Select tool
3.      Enhance tool
4.      Draw tool
5.      Modify tool
Tools in the view group of the expert mode toolbox. Zoom tool (z) Zoom in or zoom out your image. The related tools shown in the Tool Options bar are Zoom in and Zoom out. For more information about the Zoom tool, see Zoom in or out. Hand tool (H) Moves your Photoshop elements workspace. You can drag your image using this tool. For more information see viewing images in Expert or Quick modes. Tools in the select group of the Expert mode toolbox .Move tool (V) Moves selections or layer.
For more information, The move tool lets you cut and drag a pixel selection to a new location in the photo. You can also use the tool to move or copy selections between photos in Photoshop elements and to photos in other applications that support selections. Rectangular Marquee tool (M) Selects an area in your image in a rectangular box. Hold the shift key to make the selection a circle. Lasso tool (L) Selects an area in your image in a free-form shape . Magnetic Lasso tool (L) Selects part of an image by selecting the high-contrast edges around a shape. Polygonal Lasso tool (L) Draws straight-edged segments of a selection border.
Quick Selection tool (A) Makes a selection based on color and texture similarity when you click or click-drag the area you want to select. Selection Brush tool (A) Selects the area where you paint with the brush. Magic Wand tool (A) Selects the pixel with similar colors in a single click. Refine Selection Brush tool (A) Adds or removes areas to and from a selection by automatically detecting the edges. For more information on this tool. Auto Selection tool (A) Automatically makes a selection when you draw a shape around the object you want to select.
Tools in the enhance group of the Expert mode toolbox. Eye tool (y) removes the red-eye effect pet eye and correct closed eyes in your photos. Without those Photoshop there are not to imagine a single day to use. So clipping path is using in Adobe photoshop.

How To Optimize Your Product Photo For E-commerce


When it falls eCommerce. Spending good money on marketing and promotion of your online shop makes little difference if your products do not match the manner they are displayed on the site and for more optimization of your product, you have to use clipping path and clipping path services which may provide the clipping path service provider company. On the other side, it is possible to transform a browser into a customer by providing several high-quality product pictures on the item list. Sales study showed that pictures are one of the most significant requirements for purchasing behavior, which analyzed information on nine million products to detects what item content affects the transitions. Not only that online marketplace like Amazon. eBay, Flipkart, etc. have their image optimization requirements to be able to do business with them.
We describe some methods you can transform your original pictures into shimmering item pictures that catch the eye and willingness of your clients. Put it a simple and focused once again almost three in five US digital participants refers to the Salsify study and said that they would prefer to see three to four pictures. Just 1% said he doesn’t like seeing any picture. Online merchants are millions around the world. Online shoppers have a choice of any item, so he sure to offer them a straightforward understanding of what they are shopping for and from all perspectives.
Keep the image simple for eCommerce product image photography present your product's image in the simplest, most uncluttered and easiest way. This implies that the real item is not distracted or added. Use a clear white backdrop with useless components, graphics, texts and other components without distractions. Select the best angle consideration the shape the figure and how the product is used. Did you put the product to show its shape as flat and informative as possible?
Get your photos sharp and with the correct white balance, we can never overemphasize the significance, from the background to the foreground, to shoot your products with a profound depth of field. This implies that a tiny lens opening is used a bigger stop range like or more.
Thrive in the age of visual commerce our culture is becoming more and more visual. Product photos, therefore, play a key and strong part in the marketing trip of the client, especially for thousands of years. With Instagram snap chat and emoji the Digital natives are now growing up and never far from their mobile device.
This extremely powerful demography this is projected to have controls worldwide between $19 billion and $24 trillion by 2020 with such extremely enhanced visual skill and material from every internet channel is not tolerant to under standard imaging. Deloitte argues that it is extremely important. Please ensure the quality and professional completion of your item pictures.
Represent your brand in its best light first what is your brand image and you need to know this yourself. This must be expressed in everything from messages and messages to advertising campaigns to the visual design of your online store with our client.
Due to the visual drive of online shopping, your shop can compete with other eCommerce dealers to large brands when you introduce you in exciting, vibrant aspects that individuals can see brand information and their real colors.
How to start with a clean background, although during pros production you will render the picture background transparent this job will be made faster and easier by beginning the smooth white classroom context. To create the infinity cove with a bridging right angle from the table to the wall either use foam plates, a light temple or a big sheet of paper carton.
Pay attention to the lighting lookout for reflection Uniform environments weird color-casting unpleasant and distracting shadow unnatural reflections and glare during the post-production phase many of that issue could be enhanced or even completely solved. This also contributes additional time and cash to solve these problems to get the picture correct. Save the problems and manufacturing expenses by having lighting straight from the beginning only minimal amounts of printing and printing work will be required for your pictures.
Plan your product images keeping the customer in mind Think of how your prospective clients would like to visualize the item itself when scheduling your picture shooting. Use a lifestyle or product in use photo beside the use of full-frame cameras for obtaining high-resolution consumer pictures and selecting a RAW format over. JPG plans to capture the picture in use. Show that an item in a kitchen is used for making a sweet cake for instance if you are selling mixers. If you sell clothes, consider a picture of the target client in a ski resort in the environment.
Show the package what you get designed as if you open the packing yourself with the goodies inside. If there is more than one product piece in the kit or if you sell several products. Combine call-out profit SMS with the item if you have sales points. Make sure this picture sort is professional so that the advantages and sales complement the picture not divert from it. Your option for optimizing images on a budget no need to bust your budget for high-quality pictures. The production of optimized item pictures with a minimum investment offers a range of choice.
How shoestring budget online editing solutions there are several free low-cost online alternatives if you cannot justify Adobe’s premium photo editing software costs. Keep in mind that Photoshop has no editing authority. But can readily satisfy your needs only if you have fundamental demands for post-production. GIMP, PicMonkey, Canva check out. All give severe photo editing functions together with templates to produce social media advertising creative pictures. It will take your time but if your budget is narrow, it can be an excellent answer.
Retouching requirements is outsourcing your best option the online image editing solutions like BG do not allow you to edit the history of your picture with Photoshop if you need to extract or optimize them. The next greatest budget phase will be to outsource it to the clipping path companies if that’s the only choice and you have neither the software nor the knowledge and knowledge of the platform.
Fortunately, quality costs are now very inexpensive for professional photo retouching service. And since everyone understands that time is cash it can save you valuable costs and frustration when attempting to replicate the image yourself by outsourcing your picture manufacturers. Any e-commerce dealer can achieve great product photography. For those who want to use the time and energy to shoot and modify product pictures themselves, there are many benefits. Furthermore, budget-friendly time-saving alternatives are also accessible for those whose time is restricted. In any case, the endgame must constantly show vibrant brand pictures so that your browsers are transformed into faithful long-term clients.

What Are Some Important Knowledge For Clipping Path

Clipping path is a service to leave out sharp edges of photographs. Its attach the clarity to images. Notwithstanding, it importantly removes the background of images. But in Photoshop clipping path is not an easy technique and requires professional retouch. A clipping path is a selection tool which uses to select the desired part of an image. In Photoshop using the pen tool make the tough work easy. Though there is a magic Wand tool, different lasso tool to select the desired portion. Both these tools select off the desired portion on the base of color. As in an image separate color are seen in a single portion. So it is intelligent to use pen tools as a selection tool.
Clipping path is a conventional method of cutting edges of objects or people in Photoshop that is so important to create image files with colorful transparent or white background. This edited image can be further used in print media magazine or other display of publicity.
In this article, We will configuration some considerable facts in respect of clipping path services and you will be known to new functions available in Photoshop, best or worst way to create a clipping path and its services step by step action to create a cutout. In amalgamation, soft edges objects or fuzzy appearances will be easily clipped out by these explanations whereas cutout is so flexible for the hard edges.
Upgrade o Photoshop As a professional graphic designer, several ways are available to achieve good quality image cutouts in Adobe Photoshop CC. It has a faster performance excellent workflow enhancement, camera shake reduction than the previous version of Adobe Photoshop. Though the clipping path is more easily accessible by Photoshop CS3 than Photoshop CC.
Creating cut out at first select the image that you want to make the cutout. Then select the pen tool and carefully click round the image concerning the edges of the material that any background parts of the image don’t end up. When anyone has finished cutout, save it as a suitable name you choose. Soon afterward, click on the right-hand submenu in the paths panel and choose. Soon afterward, click on the right-hand submenu in the paths panel and choose clipping path. Finally, select the rename from the dropdown menu press ok cutout your background. Save the image as your required file for future selection.
1.      Paths lists:
The Path lists are name plus a thumbnail image of each saved path, the current work path. To view a path, you must first select it in the paths panel. Several work paths need to be created mastering in clipping path. Always save the work path to avoid losing its content.
2.      Make work path:
How to create a new working path? Click the new path button at the bottom of the paths panel to create a new Rename it and save it. Make sure the working path is perfectly selected.
3.      Anchoring with awareness:
Pointing out of the clipping substance is termed as anchoring. Using pen tool anchoring is done to cut out an image. Without any second thought, it is the most prominent for the clipping path as it helps to delete the undesired portion.
4.      Round corner:
In an object numerous numbers of round corners are present. In that case, an anchor point is pointed then another point which acts as a terminal point named as a stick to give a round shape. It is wise to point out a stick and reshape it around the desired portion. Shaping around the round corner actually depends on the experience.
5.      Softening edges of objects:
Cutting edges are too sharp that it looks irregular to an image. For softening edges click on the sharp edges and by a selection stick, sharp edges are turned into soft edges. It is the easiest task to soften edges.
6.      Delete or add anchor point pool:
Photoshop made an easy way to reselect anchor point tool. Anchor points are flexible and it allows addition or deletion. When the cursor is placed on anchor point it is easily erasable if points are many and addable if points are less.
7.      Move anchor points:
All anchor point are movable. Clicking on the anchor point and move it to left, right up and down as arrow directs.
8.      Name:
On layer panel name the paths work. It makes an easy way to remember the working path. Choose a memorable name to recollect your path work easily.
9.      Remove background:
When the clipping path is done, it is easy to add it to the desired several changes the transparent background, paste it the accurate image. Obviously, it enhances the picture quality.
10.  Save as:
At the end of the steps, photos are saved as desired such as JPEG, PSD, JPG, PSB, etc. formats. JPEG, JPG don’t contain the working path but PSD shows the working path. So choose what you need. After this, another dialog box opened and image quality options are changed into maximum.
So they are the clipping path tools and techniques which is used by the clipping path services providing company which creates the product proto very attractive and outstanding and it must grabbing the clients mind.

A Dish Digital Photography For Healthy And Balanced Food

Food is a thing which we consume. Healthy and balanced food doesn't have to be bland as well as boring. It can be pretty tasty. Healthy food like apple juice, mango juice, strawberry juice, is the sodas for all have to take for getting power. When we consume hard food like poultry, beef, fish that time this all elements has protein. For the business owner of an online, a businessman should take their healthy food images for boosting his services. That time he needs a professional photographer for catching his healthy and balanced foods photographs.
So a professional photographer makes use of clipping path service for raising the beautiful of the food pictures. Clipping path service firm provides the most effective service for the shade modification of the food, picture retouching, image enhancement, history get rid of from the healthy and balanced food additionally. A dish book on a dining establishment there provide various type of Italian, Chinese, French food additionally. So a specialist digital photographer captures the image efficiently and efficiently and also very masterfully. They record the healthy and balanced food images for the food selection publication whereas the business owner include them in a recipe book for attracting the consumers

Significance Of Photography For Healthy Food

Recognizing the basics of photography lights, angles, etc will help you with healthy and balanced food photography. Though shooting food is rather different has captured pictures or landscape, the principles are similar.

The policy of thirds, especially in healthy food digital photography a photographer, believe that a company in rules is not to be broken, but keeping your picture made up well is very important. Learn more about the policy of thirds from clipping path service providing business.
Aperture is determined in f-stops. The smaller sized the number the broader the opening indicating extra light can enter. A vast aperture is going to show the shallow deepness of field, indicating only your subject will certainly be in emphasis as well as you will be in focus as well as you will have an obscured history. While this can work (see the shot of the macaroons with milk behind-the-scenes) you will desire a narrow aperture if you are doing an overhanging shot or trying to catch every one of the active ingredients in your dish.

Lighting If your topic is backlit the whole image will look various than if the light is originating from the sides or front.

Cooking with photography I have constantly an enthusiasm for cooking as well as cooking. When I was a kid I was thinking to come to be a chef. Early in my career, I worked numerous jobs like garments sector, It sector, etc however the IT sector like visuals developing is the one part for food digital photography. Now I am operating in an It company. Digital photography enthusiasm is concerning me from my college degree. And when I remained in college I was a great musician during that time. I simply have fun with brush and color when I was a youngster. The turning point is originating from that time.

Healthy food photography surpasses sharing a picture. Images help the digital photographer to link as well as involve with online fans. Individuals go to the on the internet store or eCommerce stores like Amazon or eBay for seeing the recipes which time a digital photographer should be a success. So clipping path service helps t the photographer by their solutions and the digital photographer taking some methods from those types of business.

We eat that what we fire a digital photographer enjoying the posting pictures before dishes that consist of chocolate, butter, and cheese however it's equally as essential to share much more healthy creations. Take the salmon pasta with peas and also the mint recipe. Seafood dishes salmon is particular things. If the professional photographer needs to modifying pictures that time the expert digital photographer requires applying clipping path service. So for photography, an on the internet businessman gives their picture to the clipping path services business for getting rid of the undesirable portion from the food, permits changing exposer, eliminating dirt and also various other stains, including unique impacts, and so on.
So it is one of the most popular services in graphic designing and digital photography globe for modifying pictures. Clipping path helps or removes the part of the photo. In an addition clipping path solution additionally aids to do clipping mask Photoshop, picture cutout, color adjustment, etc are conveniently done by their professionals and also they likewise acquire the appreciation from the customer of the healthy food. So healthy food photography has become a modern-day pattern for food enthusiasts.

What Are The Process Of Color Match Of A Product Image

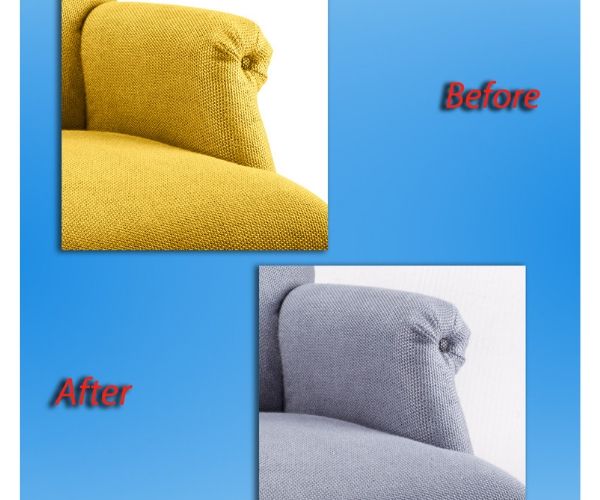
Colors can make or break the image. The right color match plays a vital role in Photoshop masking. It can be done with the assists of layering. Masking use of a selective color palette is the key to some good images. Clipping path service assists the professionals for quick color corrections service to restore your valuable image to create the perfect. So clipping path service provider company has many professionals that have a vast capacity to colorize the clients old black or white images using high tech colorizations process in Photoshop. They always use updates software to create the process easy and quick. So they are confirming their clients the best quality if they need color correction service they can knock clipping path associates.
Frequently we can see images that have a single object in color and rest is in sepia tones or a single contrasting color. For example, a blue-colored yacht on the sea with the harbor in the background on a clear day can prove to be very vibrant. The use of Photoshop masking with contrast or matching hues can be practiced. The final image has the perfect composition where the yacht is blue, which is the main focus of the image. The residuum is blurred or made into a single color. The use of layer masks is needed for the editing process. Extracting the yacht with a clipping path can also do the same. To add drama to the object it can be put in a new image.  Probably it is sailing away into the ocean or moving around a waterfall.

Color correction service is the process of editing the color of an image. Color matches main creativity is mostly to optimize photos and create them look better. So some clipping path service provider company color correction service carefully examines the color that has used in creating your product photo. If you realize that color mask benefit is broadly utilized administration by that one can without much of a stretch upgrade the color mix of his profitable photographs. Without having the appropriate color no one can’t make his photograph more appealing and infectious.

Color correction tasks are frequently needed for separate purposes in our daily fashionable lifestyle. Like online business sites, commerce sites, garments products, beauty and glamour houses, etc. For wedding or mold picture taker it is extremely important to give their customers photographs precisely what they need. So the color match is so essential part. As an expert picture, you never get an ideal color while shoo or snap the photograph. Approximately to taking the photographs, you should alter them for having the ideal color modifications. That will help you with an incredible photography work process.
Matching colors on a specific photograph can bring about harmony and creative flair to any image. In addition to this when dealing with products, accurate colors also return and increase consumer trust. Color correction or matching shifts the balance of a specific range of colors creates neutral highlights and tones down any color problems. The process of the color match of a product are as follow…; Use histograms When it comes to product retouching services, correct exposure is very important. Working with histograms enhance product photography. As white and light color objects are particularly hard to shoot due to overexposure, histograms ensure that the product image is not under or overexposed. When you adjust saturation and contrast it is easy to correct colors and attractive and consistent base map for your image.

Ensure your lighting sources are of the same temperature light sources are highly important for color correction. The light use during the photoshoot should be of the same color temperature. If not products will get separate color casts. Strobe lights should be always used for product photography. Remember lighting impacts the way color is perceived. The same color can appear separately in a variety of lighting environment. As such light plays a vital role in how we use color. For accurate color matching, reliable, lighting sources can be used to offer consistency.

Use color charts a color checker I perfect for photo retouching services. Not only does it create an attractive color profile for each set of images every time you change your lens it also dramatically impact the color of the products. Without color charts, the colors will not come out as well as they appear on the product. Color charts offer the optimal solution.
Use gray cards are perfect for color correction. After setting your lighting shoot a card first to determine whether the color needs correction. These tools are specifically designed to balance color settings accordingly making them ideal for product photo retouching services and using gray cards makes it eas to compensate for any illuminant color in your shooting space.

For getting a professional view of your photo clipping path service companies experts Photoshop designers are working 24 hours per 7 days schedule. Their well-trained clipping path experts are tracing the outline, removing background, shaping the edge and deep etching to change the background, To provide you with the uniform look of your photo they are persisting diligence serve you accurately that means always handmade clipping path service.

How To Remove Background From an image

You can learn here that how to remove the background from your photo with this step by step Photoshop tutorials, conquering hair on a white background and other challenges for designers and photo editors.
For some eCommerce retailer, photographer or marketing professional, knowing how to remove the background from your photos is a skill you will use innumerable times. This step by step tutorial will show you how to remove an image from a white background. One of the largest rejections when editing images of people are transferring the background behind the image which may waste time and destroy your images when it's done inappropriately.

In this Photoshop tutorial, you will walk away knowing how to remove an image from a white background with the background eraser tool. Once you have mastered how to cut an image in Photoshop You will be able to gear any photo or image. Clipping path service is a buzzword in the photo control market as well as to the individuals that are having a good time with image editing service.
How to remove an image from a white background in Photoshop So I here discuss the table of contents are…;

1.    Set up layers to edit an image on a white background
2.    Protect your original image file
3.    You have created a high-contrast background
4.    Erase the background from almost the image
5.    Alleviate tolerance setting to erase low- contrast background areas
6.    Dismiss the rest of the background
7.    Supersede the background.

Step-1:  Establish layers to edit an image on a white background

Assure that the layer panel is clear. Your Curtain must look like this.

Step-2: Preserve your actual image file

Duplicate your embryonic Layer and then turn it off so that you can easily start afresh if you create a mistake. Right-click on the Background layer in the Layer panel and click duplicate layer… and the next time click on the eye icon next to the original layer to turn it off now.

Step-3: You have created a high-contrast background

Now you will have to add an animated color to create it diaphanous exactly what it is you are editing.  In exchange for simply using background and effacing all the side of the termination. You can practice a dazzling color that will really view you which areas you may start to chopped out. This tasks especially well if the real background you are tasking with a dim color. One of the time you have to erase the image absolutely and are prepared to keep it into a fresh background, You may release of this valiant color. Make a fresh layer by clicking on the page icon at the  ground of the layer panel.

Use the Paint Bucket tool to fill the fresh layer with an animated color by clicking anywhere on the backdrop, while the fresh layer is approved. Withdraw the new color layer below your extract photo layer. It will vanish to open glance, but it will yet be there where you can begin to edit the image. Just attract and exude it with your mouse.

Step-4: Erase the background from almost the image

Chose the background eraser tool from the tools panel. As this background is a difficult color, You will require to use the Background Swatch sampling techniques and make assure that the background color is stable to as close to the main background color as feasible. In this instance, we have to use a difficult white. You have to assure discontinuously and prevent highlight the color is chosen. The Separate setting protects Photoshop from the mixture the color into the highlight, assists you to put the two layers differentiate so that you can bear on editing.
Moreover, these don’t always tasks on its own, so by choosing the prevent highlights ground color Photoshop will put the two layers absolutely differentiate and assure you don’t unexpectedly take out any of the real photos while you erase out the background. The subsequent appointment will rely on your photo. Begin with the brush appointment you see above and view and pinch them if they don’t perfectly task for your example.

The most significant setting here is Tolerance. These will say the brush the contrast threshold of what to erase from your background versus your highlight. So This has to erase just enough white while leaving the image. You have to test with this sating to find the right balance. Using the brush carefully erase where the image meets the background. Notice the red background viewing through this is the layer below that you created earlier. Here the contrast is far low here, So we’ll have to create some mixture to the brush set first.

Step-5: Alleviate tolerance setting to erase low- contrast background areas
As you can take a look the dim colored scarf is far closer to the background color than the image, so we require to abate the tolerance set to pay off.  In this matter, 5% works well. We also have abated the brush size down to 30 to provide us more monitoring over the region we are editing. Zoom amidst the beautiful details and diligently erase almost them using your fresh settings. The key is to search an equipoise between the brush size and tolerance for a separate region of your photo.

Step-6: Dismiss the rest of the background

Now that the finer work is completed, we can start removing the rest of the white with 50% tolerance and a larger brush again.

Step-7: Supersede the background

With the industry now we complete the file and its ready for you to supersede the red background with something more obligatory.
So you can expurgate termination tool to save time when dealing with background changes on images with enormous with background changes on images with plenty of fine edges such as hair or clouds in a sky.

When you are going to learn about image removal from the background that time must be expert for using the clipping path tools of Photoshop or else without expertise your image will be destroyed. So you for looking more attractive your image or you can learn more about removing the image from the background you can visit some clipping path service providing companies website where they serve more details about your choice.

Image Editing Service Provides A Unique Performance For Your Photo

Photo editing and images are being a conquering and time-consuming method that can be frustrating some times. Clipping path associates can assists you with reducing your workload by sharing your editing work to create you more productive with other significant tasks. Generally, customize your order, upload your photos send your necessity of how you offense them to be done then rest leave on us to ending the methods of retouching your images quickly and efficiently.
 Clipping path associate that can help you some of the following editing services. Like as Background removal service, clipping path, image masking, drop shadow, ghosts mannequin, Vector conversion, photo retouching, photo editing and so on. Image background removal services clipping path associates provide the best and highly accurate image background removal service to give their exalted clients professionally edited and perfect images.

Their technically skilled experts read the needs of the clients and render their best services with a high-quality product. Image background removal is indisputable for every business person who markets his or her objects online through separate platforms like Amazon, Flipkart, eBay, Shopify, etc. So clipping path associate provides the best image background removal service of the market and creates stand crowd with highly satisfied customers as they focus on mainly on clients necessity quality of images and swiftly delivery.

Image masking service when someone opens the book of photo editing, the page of photo masking can never remain unopened. The reason behind it is that image masking I one of the most important filters that can assist a person in enhancing the beauty of an image. Masking an image can be difficult as well as effortless and the difficulty level of editing separate according to the wizening of the image. Many of the eCommerce companies, ad-campaign project leaders and publishing houses have enjoyed their image masking services in both current and past time.

Their creative team of employees has got amplitude in their hands with which they can beautify the images so well. At last, I want to say image masking is at the fingertips of their editors which makes them so special and unique in the market. Drop shadow when it comes to the beautifying any product drop shadow service plays the most relevant role in that time. As the name suggests drop shadow service includes providing shadow to any image with the assistance of right editing tools.

Therefore imagination net has hired a professional who can create their products look more amazing and fantastic. At clipping path associate you will get a highly precise and detailed shadowing service. The reason behind it is that the employees of their company has not only got the talent but also very well training. Not only this but also you will be surprised to now that their company has worked with an excess of multinational companies in creating their product images interesting.
Also, every employee of their company is punctual due to which you will not have to face any issue as they follow the very tough rule provided by their clients. But being their clients you can share your ideas to them for customizing photo to making the photo unique. Ghosts mannequin services clipping path associates are providing the photo editing service for the last eight years to the clients all around the world. The company offers professional services related to image background removal along with clipping path and image masking.

Clipping path associate also provides drop shadow, vector conversion, ghosts mannequin, photo retouching, and product photo editing services at very budget-friendly rates. All these services are exclusively designed for weddings, garments products, landscape photos, jewelry, real estate companies along with eCommerce photography.

The photo editing service begins with the account creation process of the users to ensure the privacy of the clients. Ghosts mannequin services with the help of mannequins the product images become quite dull but if the clipping path associate creates the mannequin as the ghosts then the images can tell the most of the product that a customer needs to know and wants to know about their services that they provide the best service for consumer which is really magnificent.

Vector conversion when it comes the transferring the common images or picture or vector images the anyone cannot do that themselves. In that case, they always searching the assists of professionals so that may satisfy any customers expectations. Photo retouching sometimes the photo does not need much editing because there already happening glory. But there is only a need for a little change. In that time don’t try to edit your photo if it's needed you have to give your photo to the professionals. And they must serve you unique photography.
There are  some of the most popular photo editing tasks are listed like as enhancing light and sharpness of the photo, color correction adjustment for photos/images, glamour photos, portraits and retouching for eye, teeth, and lips, merger and combine multiple images in a single frame, creates exceptional group photos, changing color,  background, and tone of images.

So image editing service provides a photo unique performance which looks amazing. And when its looks more beautiful that time customers may satisfied about the photo and this time every clipping path service providing company like clipping path associates who are assisting them who are thought to edit their photo from a professional.